This procedure was developed by Ken Lux and Johan Tabora.
Fuel cells are devices that convert a fuel and an oxidant directly into electricity. In this manner, they are similar to batteries. However, a battery has a limited amount of chemical reactants stored inside its case and once these reactants are consumed the battery is either discarded or must be recharged to replentish the reactants. A fuel cell, on the other hand, will continue to generate electricity as long as it is supplied with fuel and oxidant.
In a fuel cell a fuel, such as hydrogen or methanol, is electrochemically oxidized to produce electrons. These electrons are forced through a load by an electronically insulating electrolyte and react at the cathode to electrochemically reduce the oxidant. The electrolyte conducts ions between the anode and cathode to balance the charge flowing through the load. In order to increase the rate of reaction at the anode and cathode, electrocatalysts, such as platinum, are used to promote the oxidation and reduction reactions. In this activity a polymer-electrolyte membrane (PEM) is used as the electrolyte. When this PEM is soaked with water it conducts protons generated at the anode by the oxidation of the fuel to the cathode where they combine with oxygen to form water.
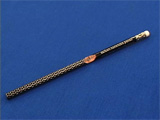
Remove some wood from a pencil to expose the graphite, such that an
alligator clip can be connected.
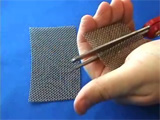
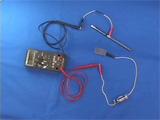
Connect the negative lead of a 1.5 V battery to the nichrome
screen. Connect the postive lead to the graphite in the pencil. If an
ammeter is available, include it in the circuit.
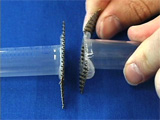
Place the two electrodes in a ~7 mM solution of chloroplatinic acid and begin
the electrolysis. The current should be about 0.2-1.0 milliamps.
Electrolysis of this solution will deposit platinum metal on the negative electrode. Deposit platinum for about 15-30 minutes. As the solution is electrolyzed, hydrogen may be evolved. Shake the electrode
to remove hydrogen bubbles so that all the nichrome stays in contact with
the electrolysis solution.
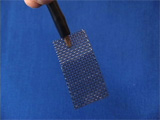
The platinum-coated portion of the nichrome will look darker. This is due to the roughness of the platinum coating.
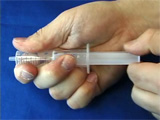
Obtain two syringe barrels after removing and discarding the plungers.
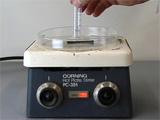
Place the screen in a petri dish on a hotplate. Melt the syringe barrel
onto the platinum-coated portion of the screen. Lift the screen with tweezers,
and quickly move it to the benchtop and apply pressure to the syringe barrel to form a smooth flat surface before the plastic resolidifies. There should be platinized screen covering
the opening in the tube.
Repeat a second time. Bend the uncoated screen away from the opening.
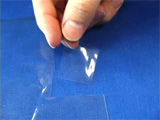
Obtain a 1" x 1" square of Nafion membrane.
Prepare 5-minute epoxy.
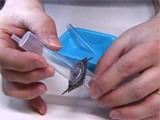
Spread epoxy around the opening on each tube. Glue the nafion membrane
between the screens. Apply pressure continually while you wait for the epoxy to harden.
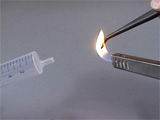
Heat the end of the tweezers and melt a hole near the end of one syringe.
(Thus will allow air to leave when you squirt water in the exisiting opening.)
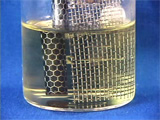
Add water and check for leaks.
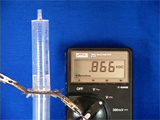
The lower compartment is exposed to the atmosphere (oxygen). To the top compartment, add a fresh solution of aqueous sodium borohydride as a hydrogen source
and measure the voltage produced by the fuel cell.
Alternatively, the upper compartment is exposed to the atmosphere (oxygen).
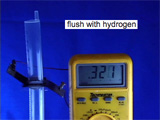
Flush the lower compartment with hydrogen gas and measure the voltage
produced by the fuel cell. You can demonstrate that the voltage depends
on the hydrogen concentration by alternately flushing with hydrogen gas
and helium gas. (These two movies play at 2x normal time.)
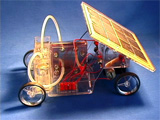
A commercial toy car uses photovoltaics to electrolyze water and produce hydrogen and oxygen which can be used in a fuel cell to run the car.
Materials
The membrane and electrodes were assembled several months prior to use.
The device was activated by wetting the membrane with distilled water
and supplying hydrogen gas to the lower compartment.
Wires with alligator clips: Mouser (#13AC012)
http://www.mouser.com.
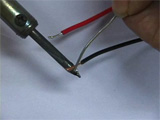
The movie shows assembly of the battery holders. Cut in half a wire with
aligator clips on each end. Strip off the insulation for a short distance.
Use a soldering iron to melt some solder onto each wire and onto the ends
of the battery holder, then use a soldering iron to connect the wires
to the battery holder.